


How to Change the Wattage on Vaporesso Xros Vape Kits?
Irin MainiThe XROS vape kits from Vaporesso have become a popular choice mainly because of their simplicity. You don't need to have previous experience with vape devices to use this range. However, the devices still give you plenty of control through various power modes, wattage settings, airflow sliders and different pod resistances.
All these settings can be slightly confusing, especially when it comes to changing the wattage, which directly impacts your vaping experience. In this guide, we look at the wattage options available in the XROS range and how to adjust the wattage settings on the different devices in this range.
-


-
Regular price £15.99Regular priceUnit price per
£19.50Sale price £15.99Sale -
Regular price £17.99Regular priceUnit price per
£18.99Sale price £17.99Sale -
Regular price £34.99Regular priceUnit price per
-
Regular price £10.99Regular priceUnit price per
-
Regular price £11.99Regular priceUnit price per
£14.99Sale price £11.99Sale -
Regular price £7.99Regular priceUnit price per


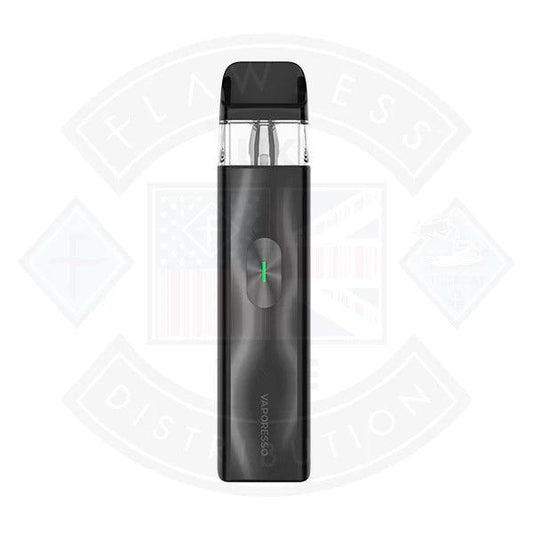

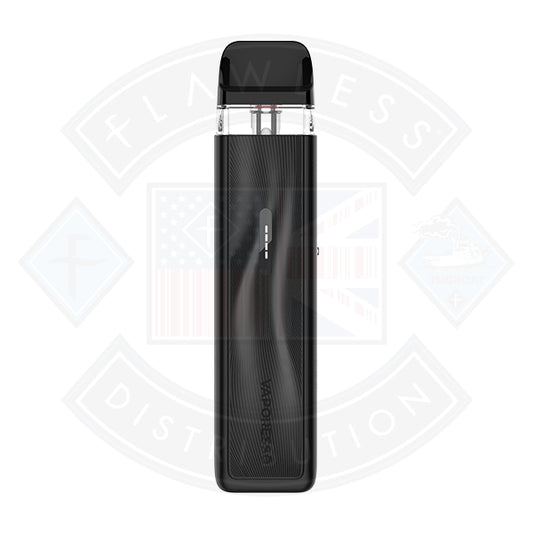

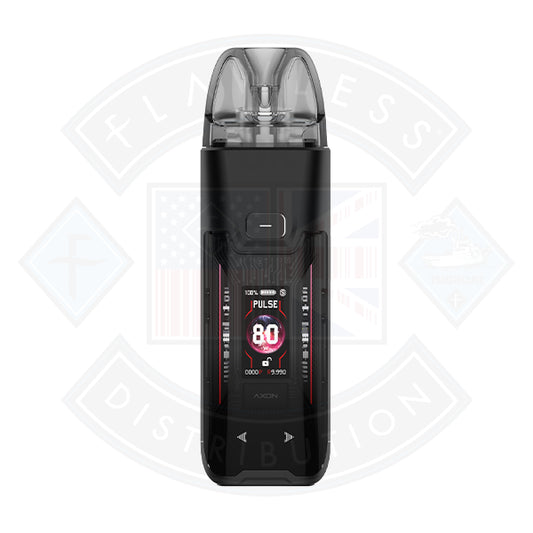



A Look at the XROS Collection
The XROS range focuses on pod vaping, offering devices that are compact, easy to refill and beginner-friendly. These vape kits are ideal for nic salts, MTL vaping or a restricted direct-lung draw.
Each device has a different level of control, with some being almost entirely automatic and others requiring a bit more tinkering to achieve optimal performance.
Some of the options you can try in the XROS range include:
Vaporesso XROS Pro
The Vaporesso XROS Pro is one of the more advanced devices in the XROS line-up. It has a screen, adjustable airflow, a strong battery and more power control than basic pod kits. Vaporesso describes it as the first XROS series device with a screen, showing the wattage level, puff count and battery level when using the 0.4Ω pod.
This is the model to consider if you want an XROS kit that feels compact yet still offers proper adjustment. It is especially good if you like a warmer vape, stronger flavour and a more customised feel.
Main Features
-
Up to 30W output: The XROS Pro can go up to 30W, which gives it more punch than simpler pod kits. This is useful if you like the 0.4Ω pod and want a stronger restricted direct-lung vape.
-
Screen display: The screen makes it easier to see your wattage, battery level and puff count. That is handy if you like knowing exactly what your device is doing.
-
0.4Ω pod wattage adjustment: With the 0.4Ω pod, the XROS Pro allows more precise wattage control. With other compatible XROS pods, the device uses ECO, Normal and Power modes instead of exact wattage levels.
-
Adjustable airflow: You can adjust the airflow to make the draw tighter or airier. This changes how warm, smooth and strong the vape feels.
-
Compatible with several XROS pod resistances: Vaporesso lists XROS Pro pod compatibility across 0.4Ω, 0.6Ω, 0.8Ω, 1.0Ω and 1.2Ω resistances.
Pros
-
Good power control with the right pod
-
Clear screen
-
Strong flavour
-
Adjustable airflow
-
Great for users who want more control
-
Still compact enough for daily use
Cons
-
Exact wattage control is mainly available with the 0.4Ω pod
-
More settings than a basic beginner kit
-
May feel too powerful for very light vapers
-
Uses more battery and e-liquid at higher wattages
Vaporesso XROS 4
The Vaporesso XROS 4 is a stylish pod kit that sits nicely between simple and advanced. It is not as screen-heavy as the XROS Pro, but it offers adjustable power modes and precise airflow control, ensuring a customised vaping experience.
The XROS 4 has a 1000mAh battery, up to 30W output, COREX 2.0 pod technology and Pulse Mode power boosting.
This kit is ideal if you want something easy to use but still want the option to make the vape stronger or softer. It is a good fit for both mouth-to-lung and restricted direct-lung users, depending on the pod and airflow setting.
Main Features
-
1000mAh battery: The battery is a solid size for a compact pod kit. It should suit many everyday vapers, although heavy users may still need to charge it during the day.
-
Up to 30W output: The XROS 4 can support stronger pods such as the 0.4Ω option, giving you a more powerful vape when needed.
-
Three output modes: Instead of full watt-by-watt adjustment, the XROS 4 uses output modes. You can adjust them by pressing the fire button three times to open the adjustment interface, followed by single presses to select your preferred mode.
-
Precise airflow adjustment: The airflow slider lets you change the feel of the draw. Closing it down gives a tighter inhale, while opening it gives more air and a looser vape.
-
COREX 2.0 pod technology: Vaporesso highlights COREX 2.0 in the XROS 4, designed to improve flavour and pod performance.
Pros
-
Simple but not too basic
-
Adjustable output modes
-
Compact and stylish
-
Good flavour performance
-
Works with different XROS pods
-
Easy airflow control
Cons
-
No exact wattage control like the XROS Pro with the 0.4Ω pod
-
Battery is smaller than the XROS Pro
-
Power mode names may confuse beginners at first
-
Higher output can use more e-liquid
XROS 4 Nano
The XROS 4 Nano is a small, square and surprisingly capable device. It is built for people who want a compact pod kit but still like having a proper screen and power adjustment.
Vaporesso describes the XROS 4 Nano as the first XROS device with a 1.3-inch TFT colour screen. It also supports up to 30W output and is compatible with the 0.4Ω pod for precise wattage adjustment, while other pods use three-level adjustment.
That makes it a great little option if you want more information on-screen without carrying a tall, pen-style device.
Main Features
-
1.3-inch TFT colour screen: The screen gives the XROS 4 Nano a more modern feel. It makes the device easier to read and more enjoyable to use.
-
Up to 30W output: Like the XROS Pro and XROS 4, the Nano can reach up to 30W, depending on the pod fitted.
-
Precise wattage with the 0.4Ω pod: With the 0.4Ω pod, the XROS 4 Nano supports exact wattage adjustment. With other pods, it uses three-level power adjustment instead.
-
Compact shape: The Nano design is shorter and wider than a standard stick-style pod kit. It is easy to pocket and feels comfortable in the hand.
-
Adjustable airflow: You can fine-tune the draw to suit your pod, e-liquid and vaping style.
Pros
-
Compact but feature-packed
-
Large screen for its size
-
Precise wattage with the 0.4Ω pod
-
Good for both MTL and RDL vaping
-
Easy to carry
-
More customisable than basic pod kits
Cons
-
Not every pod provides exact wattage control
-
Small body may not suit everyone
-
Screen can use more battery
-
More settings than a very basic starter kit
Why You Should Understand Wattage in Vape Devices
Wattage is an important factor when choosing a vape device. It affects the device's performance and the experience you get from it.
Lower wattage offers a cooler, softer vaping experience, while higher wattage delivers thicker clouds, stronger flavour and a warmer draw. Adjusting the wattage means you can fine-tune your vaping experience to suit your preferences.
Here are a few reasons why you should pay more attention to wattage settings.
Wattage Affects Flavour
The right wattage can make your e-liquid taste much better. The wrong wattage can have the opposite effect. If the power is too low, the flavour may feel weak or muted. If the power is too high, the flavour can taste too hot, harsh or burnt.
Wattage Affects Vapour Production
Higher wattage usually creates more vapour. This can be nice if you like a fuller puff, but it is not always better.
If you are using nic salts or higher-nicotine e-liquid, too much vapour can feel too strong or scratchy. For a smoother mouth-to-lung vape, lower power or a higher-resistance pod may feel better.
Wattage Affects Throat Hit
Throat hit is the little kick you feel at the back of your throat. Some former smokers prefer it because it can feel closer to the sensation of smoking a cigarette.
Higher wattage can increase throat hit, especially with stronger nicotine. If your vape feels too harsh, lowering the wattage, opening the airflow slightly or switching to a different pod can help.
Wattage Affects Battery Life
Higher wattage drains the battery faster, meaning more frequent charging and potentially reducing the amount of time you can vape between charges.
Wattage Affects E-Liquid Use
With higher wattage settings, you also go through your e-liquid faster. The pod heats more strongly and vaporises more e-liquid every time you draw.
If you are trying to make your e-liquid last longer, lower wattage or a higher-resistance pod is usually the better choice.
Wattage Affects Pod Lifespan
High wattage can push a pod closer to its operating limits. At higher wattage settings, you may burn through your pods faster.
There is a characteristic burnt taste that pods can produce when they are nearing the end of their life. If you are keen to extend the lifespan of your pods, consider keeping the device's wattage within the recommended range.
How to Change the Wattage on XROS Vape Kits
The wattage setting on XROS vape kits is a handy feature, but it is only helpful if you know how to make the adjustments. Depending on the XROS device you have, adjusting the wattage settings will be slightly different.
XROS Pro
The XROS Pro gives you the most direct wattage control when using the 0.4Ω pod. With other pods, you will usually adjust between ECO, Normal and Power modes instead of choosing exact watts.
Vaporesso's XROS Pro manual states that when using the 0.4Ω pod, you click the power button three times within two seconds to enter the power-setting interface, then click again to adjust the wattage.
What to Do Before Changing the Wattage
Before you change the wattage, check which pod is fitted. This matters because the XROS Pro behaves differently depending on the pod resistance.
If you have the 0.4Ω pod installed, you can adjust the wattage more precisely. If you have a 0.6Ω, 0.8Ω, 1.0Ω or 1.2Ω pod, expect mode adjustment instead.
You should also check that the device has enough e-liquid to prevent the coil from burning when you adjust the wattage. If you have just refilled the pod, let it sit for a few minutes to allow the cotton to saturate with e-liquid before adjusting the wattage and vaping.
Step-by-Step Guide on How to Change the Wattage on the XROS Pro
-
Turn on the device: Press the fire button five times quickly if the device is switched off.
-
Check the pod: Make sure it is fitted properly and has enough e-liquid.
-
Click the power button three times: Press it three times within two seconds to enter the power-settings interface.
-
Click again to adjust the wattage: With the 0.4Ω pod, each click lets you adjust the wattage level.
-
Choose your preferred setting: Start lower if you are unsure. You can increase it gradually until the vape feels warm, smooth and flavourful.
-
Wait for the setting to confirm: After a short pause, the device should return to normal use.
-
Take a gentle puff: Try a short puff first. If it tastes good and feels comfortable, you are set.
XROS 4 Nano
The XROS 4 Nano also gives you precise wattage adjustment with the 0.4Ω pod and power-level selection with other compatible pods.
What to Do Before Changing the Wattage
Just like the XROS Pro, you should start by checking the resistance of the pod you have in place. You should also confirm that the pod contains enough vape liquid and refill it if necessary before adjusting the power.
With the XROS 4 Nano, you should also check the airflow, as wattage and airflow work together to influence your vaping experience.
Step-by-Step Guide on How to Change the Wattage on the XROS 4 Nano
-
Wake or turn on the device: If needed, press the fire button five times quickly to switch the device on.
-
Check the screen: The XROS 4 Nano has a screen, so check that the pod is recognised and the battery is charged.
-
Press the power button three times: Use three quick clicks to enter the power or mode setting.
-
Adjust the wattage or mode: With the 0.4Ω pod, click to adjust the wattage. With other pods, click through the available power levels.
-
Start gently: If you are not sure where to begin, start at the lower end and move up slowly.
-
Let the setting save: Pause for a moment so the device returns to the main screen.
-
Test the vape: Take a short puff and check the flavour, warmth and throat hit.
XROS 4
The XROS 4 is slightly different because it focuses more on output modes than exact wattage. The XROS 4 uses three adjustable output modes, and you can press the fire button three times to access the adjustment interface. Each subsequent press adjusts the output mode.
What to Do Before Changing the Wattage
Before changing the output level, check your pod resistance and e-liquid. A lower-resistance pod, such as 0.4Ω or 0.6Ω, usually gives a warmer, stronger vape. A higher-resistance pod, such as 0.8Ω, 1.0Ω or 1.2Ω, usually feels cooler and tighter.
Make sure your pod is not dry. Refill it before the liquid level gets too low.
Also check your airflow. If the vape feels too hot or harsh after increasing the power mode, open the airflow slightly or drop back down to a lower mode.
Step-by-Step Guide on How to Change the Wattage on the XROS 4
-
Turn on the XROS 4: Press the fire button five times quickly if the device is switched off.
-
Make sure the pod is fitted properly: Push the pod firmly into place and check that there is enough liquid inside.
-
Press the fire button three times: Three quick presses take you into the adjustment interface.
-
Press again to cycle through output modes: Each press moves through the available power levels.
-
Choose the mode that feels best: Use a lower mode for a cooler, smoother vape. Use a higher mode for more warmth, stronger flavour and more vapour.
-
Wait for the device to save: After a short pause, the XROS 4 should return to normal use.
-
Take a test puff: If the vape feels too strong, lower the mode. If it feels weak, move it up one level.
What Is the Recommended Wattage on XROS Vape Pods?
The recommended wattage depends on the pod resistance. As a general rule of thumb, lower-resistance pods need more power, while higher-resistance pods need less.
The XROS range includes several resistance options, and XROS COREX 2.0 replacement pods are available in multiple resistances to suit different vaping styles.
0.4Ω XROS Pod
This pod is usually best for a warmer, stronger vape and restricted direct-lung use. It is the pod that unlocks precise wattage adjustment on devices such as the XROS Pro and XROS 4 Nano.
A common range for this type of pod is around the higher end of the XROS output, making it suitable for users who want more vapour and a punchier feel.
0.6Ω XROS Pod
The 0.6Ω pod is a good middle-ground option. It can suit a loose mouth-to-lung draw or restricted direct-lung vaping.
It gives more vapour than higher-resistance pods but usually feels less intense than the 0.4Ω pod. It is a good option if you want plenty of flavour without the vape becoming too warm.
0.8Ω XROS Pod
The 0.8Ω pod is a popular everyday option for nic salts and 50/50 e-liquids. It gives a satisfying mouth-to-lung vape without feeling too powerful.
This is a good choice if you want a balance of flavour, throat hit and battery life.
1.0Ω XROS Pod
The 1.0Ω pod is better suited to a cooler, tighter vape. It can be useful for higher nicotine strengths because it does not produce as much vapour as lower-resistance pods.
If you are trying to keep the inhale closer to a cigarette-style draw, this can be a comfortable option.
1.2Ω XROS Pod
The 1.2Ω pod is usually best for a tighter mouth-to-lung vape and lower-power use. It can work well with nic salts and higher-nicotine e-liquids.
It is also a good option if you want your battery and e-liquid to last longer.
Final Thoughts
Changing the wattage on a Vaporesso XROS kit is usually simple once you know what your device can do.
The XROS Pro and XROS 4 Nano give precise wattage adjustment when using the 0.4Ω pod. With other pod resistances, they use power modes. The XROS 4 uses adjustable output modes rather than full watt-by-watt control.
The easiest rule is this: start low, take a few gentle puffs and increase the power slowly until the vape feels right. If it tastes burnt, feels too hot or becomes harsh, turn it down.


